Field Summary
Field Summary
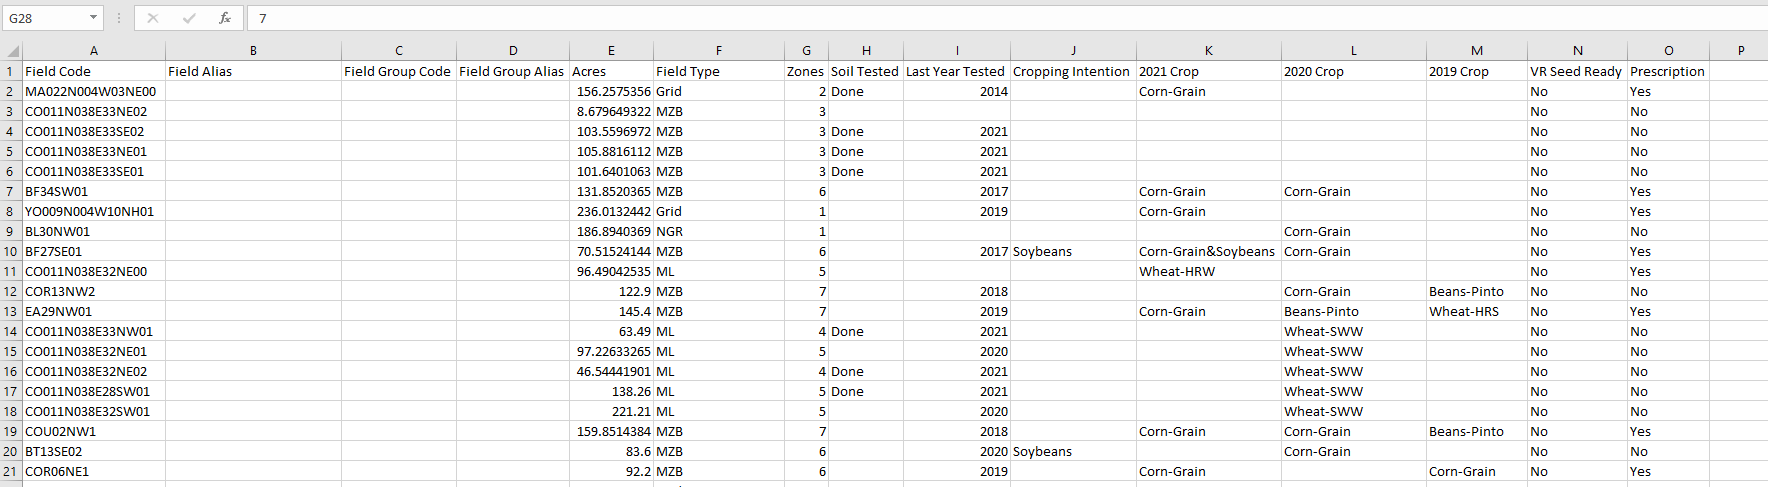
Field Summary offers a single page summary of an entire farm. Users can quickly view a list of a grower’s fields with field information such as whether the field has been soil tested or has had a prescription written for it.
In this chapter you will learn how to:
View Field Information
1. Use the profile selector to navigate to the desired Grower. Click on the Grower’s name.
2. Use the scroll bar on the bottom of the screen to view every column.
3. Each column can be sorted by clicking on the column heading.
4. Click Settings to customize which columns are shown.
5. Click Print XLS to download a spreadsheet of the Field Summary page.
Quickly Access Other Tools
Users can quickly access other tools in the software from the Field Summary page.
1. Right click on a field.
The field can be opened in Prescription Builder, Application Manager, Soil Sample Grapher, Map Maker, and Batch Print.
Click View Soil Tests, to generate and download a table of the field’s soil sample results.
Click Google Earth > Open Field, to download the field border in the .kml format. Double click on the downloaded file to open the field in Google Earth.
Click on Revenue By Zone to create a pdf report using yield data and active prescriptions showing cost and revenue by zone.
Change a Field Alias
A Field Alias can be changed in Field Summary. Note: To change a field ID, contact the FieldReveal Mapping Center.
1. Right click on a field and select Change Field Alias.
2. In the Edit Field Alias window, enter a new name and click Confirm. The new field alias will now be displayed throughout FieldReveal Tools.
Print XLS
1. Select Print XLS to print out an excel spreadsheet of everything that is show in Field Summary.
Change the Cropping Intention
Users can edit the Cropping Intentions column. This is strictly for planning purposes and will not affect prescriptions.
1. Select a field or multiple fields from the Field Summary list. Selected fields will be highlighted in blue.
2. Choose a crop from the dropdown menu on the bottom left corner of the page, and click Change Crop.
3. The Cropping Intention column will update for the selected field(s).
4. To erase a cropping intention, select the desired field(s). Choose Clear Crop from the crop dropdown menu, and click Change Crop.
Send to FieldReveal Dispatch
Application files can be sent to FieldReveal Dispatch from the Field Summary Page. However, the FieldReveal Mapping Center recommends sending files to dispatch from Application Manager so that the file type and Application Reports can be verified before dispatching.
1. Select a field(s) from the Field Summary List. The selected field(s) will be highlighted in blue.
2. Click Send to FieldReveal Dispatch.
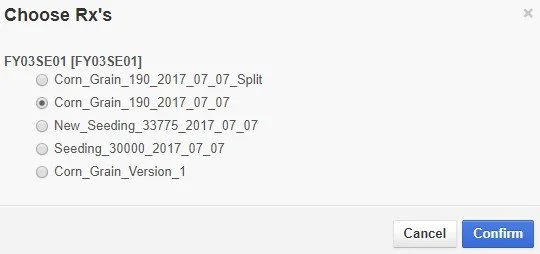
3. Select a prescription to dispatch from the Choose Rx’s window.
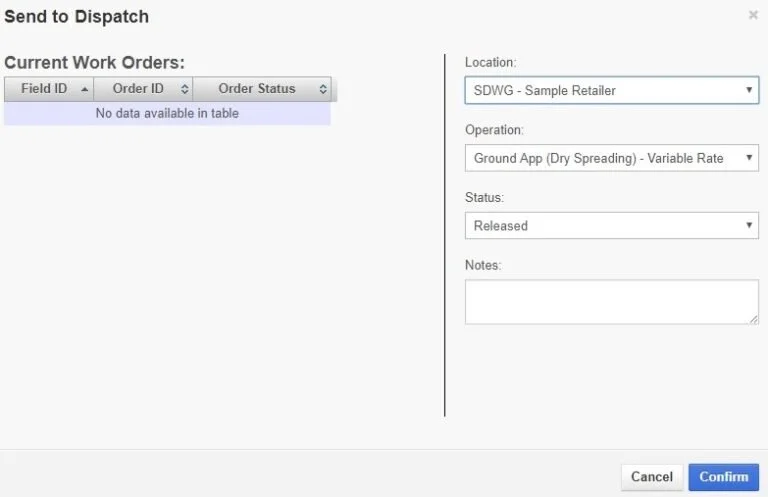
4. Complete the AgSync/Ground Control Online form.
5. Click Confirm.


2. Click on a Map thumbnail to open the field in Map Maker. Thumbnails need to be enabled in the Settings for this feature.
3. Click on the year in the Last Year Tested column to open the field in Soil Sample Grapher.