How to Add a Field Border in New Field Request
Add a Field Border
Field borders can be added in two ways. New borders can be created by drawing a border on the Map Pane or uploading shapefiles of the border.
Create a New Field Border
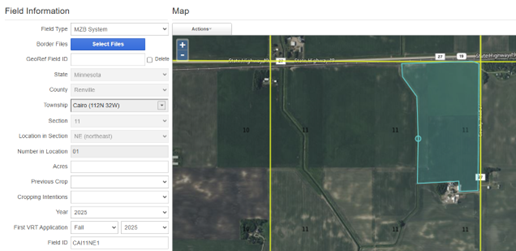
1. Enter the State, County, Township, Section, Location in Section, and Number in Location using the dropdown menus. When each of these options are chosen, the Map Pane zooms in to the selection.
2. The Field ID is created automatically when the boxes are filled. The Field ID is the field’s unique identifier in the FieldReveal database. The Field ID can be modified by clicking in the box and entering a desired field ID. It may be helpful to turn on the Sections Layer on the Map Pane to determine the Location in Section.
There are two default options for the Field ID, either eight or sixteen characters:
Using the eight character default, the field ID would be CAI11NE1. CAI = First three letters of the Township, 11 = Section, NE = Location in Section, 1 = Number in Location. If the township has two words, use the first letter in each word for the township designator (Elm Grove = EG).
Using the sixteen character default, the field ID would be RE112N032W11NE01. RE = First two letters of the County, 112N = Township, 032W = Range, 11 = Section, NE = Location in Section, 01 = Number in Location.
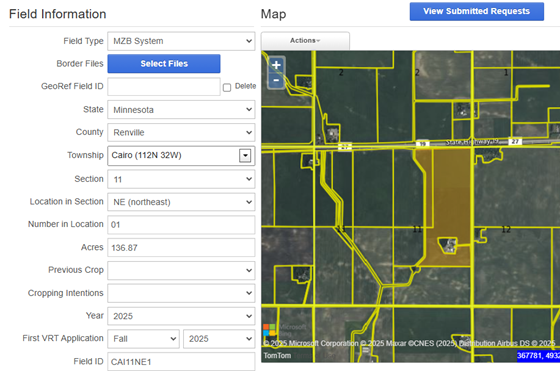
3. Click the Actions button above the Map Pane. Users have the option to Add a Border from CLU or manually Draw a Border.
To manually draw a border, click Actions > Draw Border. This will lock the information left of the Map Pane, allowing the user to freely zoom in and out to assist in drawing a border. Place the vertices of the border by left clicking. To complete the drawing, double left click the mouse.
To add a CLU border, click Actions > Add Border from CLU. The CLU borders are displayed in yellow. Click on the border or borders that make up a field.
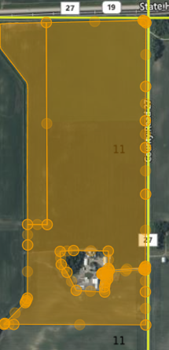
4. To edit a border on the Map Pane, click Actions > Edit Points / Vertices. Click inside of the field border and notice that orange vertices appeared around the exterior of the polygon. Click on these orange dots and drag them around to modify the border. To finish editing, click anywhere outside of the field border
5. To delete the border and start over, click Actions > Delete Feature Mode, and click on the border to delete it.
6. To create an interior border or island, click Actions > Draw Border. Hold the control key while creating the interior border. Double click to finish the drawing
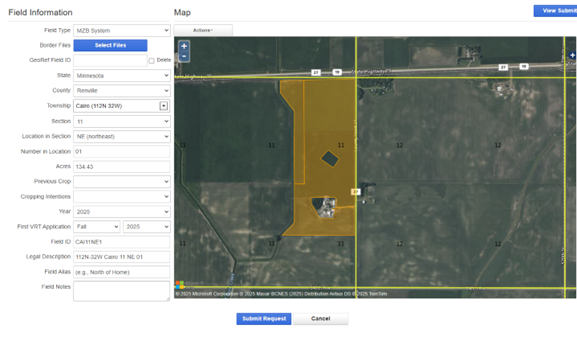
7. Finish filling out the form.
For Full MZB, MZB Lite, and Non-MZB fields, enter the Previous Crop, Cropping Intentions, Year, and First VRT Application boxes.
Enter a Field Alias. This can be any name the grower desires. Do not use illegal characters in the Field Alias box as this may cause issues with submitting, prescription, writing, and exporting. Illegal characters are everything besides numbers and letter.
Enter Field Notes. Examples include: special instructions for the zoning process, any necessary information required for accurate zoning, etc. Examples are prior crop history, prior management, previous drought or flooding, herbicide damage, feedlots, etc.
8. Click Submit Request. A message will display when the field has been successfully submitted