VR Seed Tab
VR Seed
The VR Seed tab is used to create variable rate and multi-hybrid seeding prescriptions using the fields inside the database. The entire process, from writing the prescription to creating the application file, is done inside the VR Seed tab.
The following section describes how to:
Set up Varieties and Populations
Create a Test Strip
Build a Seed Prescription
Create the Seed Prescription and Application File
Set up Varieties and Populations
Before any seed prescription can be written, users must first enter their varieties and populations to use in the prescription.
Varieties
1. Click the Edit Varieties/Hybrids button.
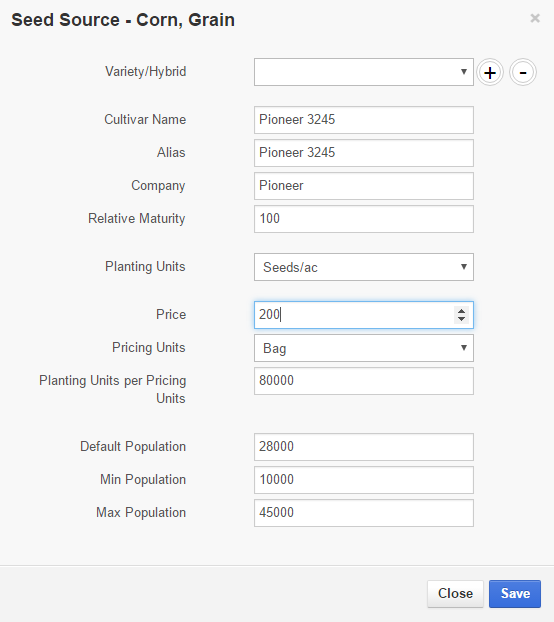
2. The Seed Source window opens. Starting with Cultivar Name, begin filling out the information in the form.
NOTE: Planting Units per Pricing Units refers to how many seeds or pounds are in a unit. For example, 80,000 seeds per bag for corn, 160,000 seeds per bag for soybeans. This is important for any report totals across the field to come out correctly.
3. Click Save when the form is complete.
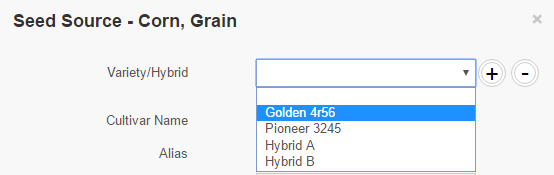
4. To enter additional varieties, click the + sign and fill out the form. Click Save when the form is complete. Users can enter multiple varieties.

3. Use the + sign to enter additional populations. Use the – sign to delete a population.

Create a Test Strip
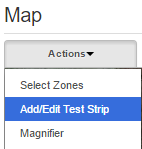
1. Click Actions > Add/Edit Test Strip.
To edit the test strip
Click Actions > Add/Edit Test Strip.
Click on the test strip in the map pane.
In the Edit Test Strip Window, make any changes and click Update.

To delete the test strip
Click Actions > Add/Edit Test Strip.
Click on the test strip in the map pane.
In the Edit Test Strip Window, click Delete.

Build a Seed Prescription
Once Varieties and Populations have been entered, the program is now ready to build seed prescriptions. This can be done by: manually selecting populations by zone or subzone, or by using a formula to calculate them.
Assign Varieties and Populations by zone:
1. Select the variety or varieties from the dropdown list and assign them to each zone.
2. Select a population from the dropdown list for each zone.

1. Select a variety and population for each sub zone in the dropdown lists. In the example below, notice how the individual zone polygons are listed: 1-1, 1-2, 1-3. Clicking on these will highlight the corresponding zone polygon on the map pane.

2.Enter the desired factor, minimum, and maximum populations. Click Save.
3.The population boxes have updated.

Build Population by Yield Data
1. Click the By Formula button.
2. Select the Use Yield Data button at the bottom of the Calculate Population By Formula window.

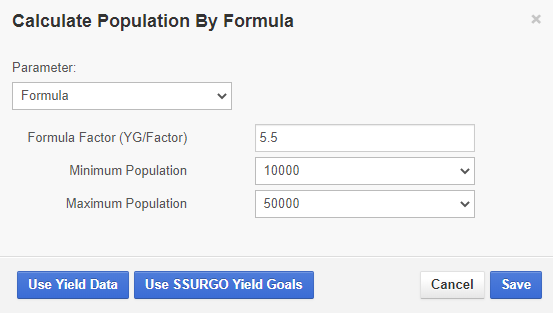
Build Populations By Formula
1. Click the By Formula button. This is an industry formula; it takes the yield goal divided by the Factor and multiplies it by 1000 to determine the population.
NOTE: There must be yield goals entered in the Yield Goals tab for the formula to calculate.
5. To edit a variety: choose a variety from the dropdown list, make any changes, and click Save.
6. To delete a variety: choose a variety from the dropdown list, and click the – sign.

Populations
1. Click the Edit Populations button.
2. In the Populations window, enter the population and unit. Click Save.

2. Click on the map to set the start of the test strip, then click again to set the end.

3. The Add Test Strip window opens. Choose the desired variety, enter the width, and population. Click Add.

4. The test strip is now displayed on the map.

Assign Varieties and Populations by Sub Zone:
Click the arrow next to the zone to show all the sub zones

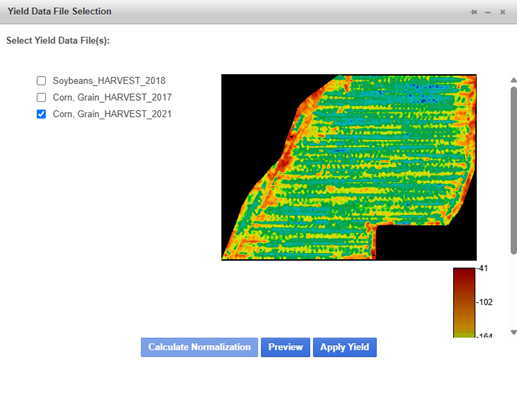
3. Once inside the Yield Data File Selection window all the available years of yield data will be listed, select the desired years and click Apply Yield.
NOTE: If multiple years of the same crop type are available the user can select multiple years of yield data and click the Calculate Normalization to normalize multiple years of data.
Build Population by SSurgo
1. Click the By Formula button.
2. Click Use SSURGO Yield Goals

Select the population for each SSURGO zone.
Create the Seed Prescription and Application File
When the parameters of the seed prescription have been entered, the seed prescription can now be created.
1. Click the Unlock Seed Rx button.
This will allow the user to create the prescription and application files. A field only needs to be unlocked once per cropping season. The cropping season resets August 1st.
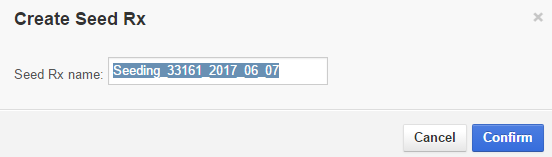
2. Click the Create Seed Rx button.
3. Enter a name in the Create Seed Rx window. The name will be pre-populated with the average population and date. This name can be changed. Click Confirm.
NOTE: FieldReveal recommends that users give their prescription a name that will mean something to them, and allow them to quickly look at the names and know which prescription is which.
Choose the correct application file type from the dropdown next to VRT Controller.
5.Click the Create Application button.
6.A message will appear when the controller files have been created and published. The files are now available in Application Manager.
7.The next time a Tool is opened, the SD icon will now be shown next to the field ID in the Profile Selector.
NOTE: To Create a Field Group seed prescription, see Create a Field Group Prescription
Load FR EQN - Clicking the dropdown arrow on the right of this button allows a saved prescription to be loaded from two places. Local Load will allow a user to navigate to a saved FR_EQN file on their computer. Database Load will load a prescription that has been saved to the FR server. This is an advanced feature. The prescriptions saved are loaded from the Save/Load Rx Tab.
Save FR EQN - Clicking the dropdown arrow on the right of this button allows a prescription to be saved in two places. Local Save will allow a user to save a prescription on their computer. Database save will save the prescription to the FR server. Only one database saved prescription is allowed per field. This is an advanced feature. Prescriptions are saved in either the Review tab or the Save/Load Rx tab.
NOTE: Load FR EQN and Save FR EQN may not be available depending on the permissions granted to your account by the FieldReveal Mapping Center and your Retailer.